Showing posts with label elementary art. Show all posts

Friday, April 1, 2016

Essential Questions in the Art Room


While the whole Essential Question thing has been a bit confusing, (sometimes I swear I’m hearing or reading conflicting information!) I finally feel like I’ve got a bit of a handle on the overarching essential questions in each of my classes.  I’m continuing to write the question(s) specific to each project, but these are a good start.  I know that online resources really helped me to write mine, so let me add to the conversation!

This will also be my last post this school year as I evaluate the writing of this blog and how it fits into the goals I’ve set for myself.  I’ve very much enjoyed writing, documenting and sharing a little bit of my classroom as I've learned about the blogging process. 


4th-12th GRADE  OVERARCHING ART ESSENTIAL QUESTIONS:

The important overall goals of my classes include: idea development and creative problem-solving, the development of practice and "stick-to-it" skills, craftsmanship, and self-expression. Hopefully these are covered in the essential questions.


4th/5th/6th:  ESSENTIAL QUESTIONS

How do we develop a good idea?

How do we make an artwork look complete?

How is practice an important part of learning anything new?

How does art help us tell people our feelings?


7th/8th:  ESSENTIAL QUESTIONS

How do artists grow and become accomplished in art forms?

How is art a form of communication?

Why is craftsmanship an important part of creating something excellent? 

How does art help us use our brains in a different way?


ART 1 / ART 2:  ESSENTIAL QUESTIONS

To what extent do artistic skill building activities help you express yourself?

What role does graphic design play in consumers' choices? (Visual Literacy Smart Goal)

In what ways can artwork reflect what is happening in a culture or society?

How can reflecting on your own work help you improve how and what you learn?


ART 3 / ART 4 / ART PORTFOLIO:  ESSENTIAL QUESTIONS

What role does persistence play in revisiting, refining, and developing your ideas?

How do artists appropriately use other’s images and ideas?

How does self-expression and creative problem solving help you in other areas of your life?


How do people engage in the visual arts throughout their lives and how do they benefit from it?


Happy teaching!

Thursday, November 5, 2015

How to Design an Awesome Poster! (Elementary version)


In one way or another, students will be asked to design posters for classes, presentations, contests, and a myriad of other areas of their lives as they get older.  Some will be hand-drawn and some will be digital, but ALL will need a good sense of design.   I decided this would be a good “life skill” to use as the focus of a project. When we started, our school-wide Red Ribbon Week was coming up and my students were offered an opportunity to create posters to be displayed, so this was the perfect time!

In doing some research to see what the graphic design experts say about designing posters, I came across this great article on thecreativebloq.com: (How to Design a Poster: 10 Pro Tips).  Because I am working with upper elementary students, I trimmed it down to 4 tips and reworded it a little.  Here is what I came up with:

1.  Find a focus.  What is your message?  What do you want the viewer to see first?

2.  Add a few details…but not too many.  You want to include some fun and interesting pieces to the poster, but not so many that we lose your main message.

3.  Balance the composition. This ties in with #2.  Lay out all of the components of your poster evenly - no big blank spaces.

4.  Mix your fonts. Use more than one letter style to give your poster a little more interest.

Here's a little graphic for you: 


We talked through all of these guidelines and I modeled how to plan out a poster on sketch paper first.  Then the kids went to work!  


As simple as these ideas seem, we can refer back to this little graphic design lesson in other ways as we come across design challenges in future projects. I also may create a bit more detailed version for my older students, too.  

Happy Creating!

Friday, April 10, 2015

Spring Birds!


I got to be the “reward” again for a sweet little class of second graders.  I have done this a few times now with the lower elementary classes that don’t get to have official Art class. (I teach 4th -12th grade.) As much as I consider myself more of a “big kids” kind of teacher, these little ones are always such a kick!  They have so much enthusiasm for anything I introduce (high school students do NOT act like this…) that it makes it fun to try new things with them. 


With the coming of spring to Iowa, we were definitely in the mood to celebrate after a long, cold winter.  We decided that some fun, springy bird paintings would be just the thing!  


I found inspiration with this image from graphicleftovers.com
and taught the students how to draw a simple bird (board diagram below), giving them lots of options for personalization. (How tall will it be?  What kind of tail and crown will it have? What size and shape will you make the wings and beak?)
After we practiced drawing, I gave them 12 x 12 paper to draw their final project, with the choice to draw one, two or three birds.   Finally, we painted them with tempera cakes and outlined them in Sharpie!

This was a great way to welcome spring.  Each of our birds had its own personality and it was so fun to see the kids’ enthusiasm translated into wonderful works of art!


Happy Spring!


Tuesday, March 24, 2015

Inspired by George Rodrigue: Blue Dog Paintings


I recently introduced 4th graders to George Rodrigue and his fun Blue Dog paintings.  We watched this video and this video to introduce the project.  Since George is an artist who was living (until he sadly passed away in 2013) during their lifetime, its neat for them to see him and hear him speak about his work.  They especially loved the references to his dog and the stories of the Loup Garou (a Cajun werewolf.) 

We looked at a calendar I had of Blue Dog paintings and checked out a few more on the internet.  Students were inspired by the variety of Blue Dog paintings that Rodrigue created and were excited to create their own.

I led them in a guided drawing of a basic blue dog and asked them to add background or accessories to their dogs to give them personality!  Many of them chose to paint their dogs blue, but they were allowed to use any color they liked.

After practice drawings, students redrew their dog on 12 x 18 paper and painted them with tempera cakes, outlining in black marker when done.


Students love the Blue Dog and I love seeing their creativity get fired up!  Happy Painting!

Friday, December 12, 2014

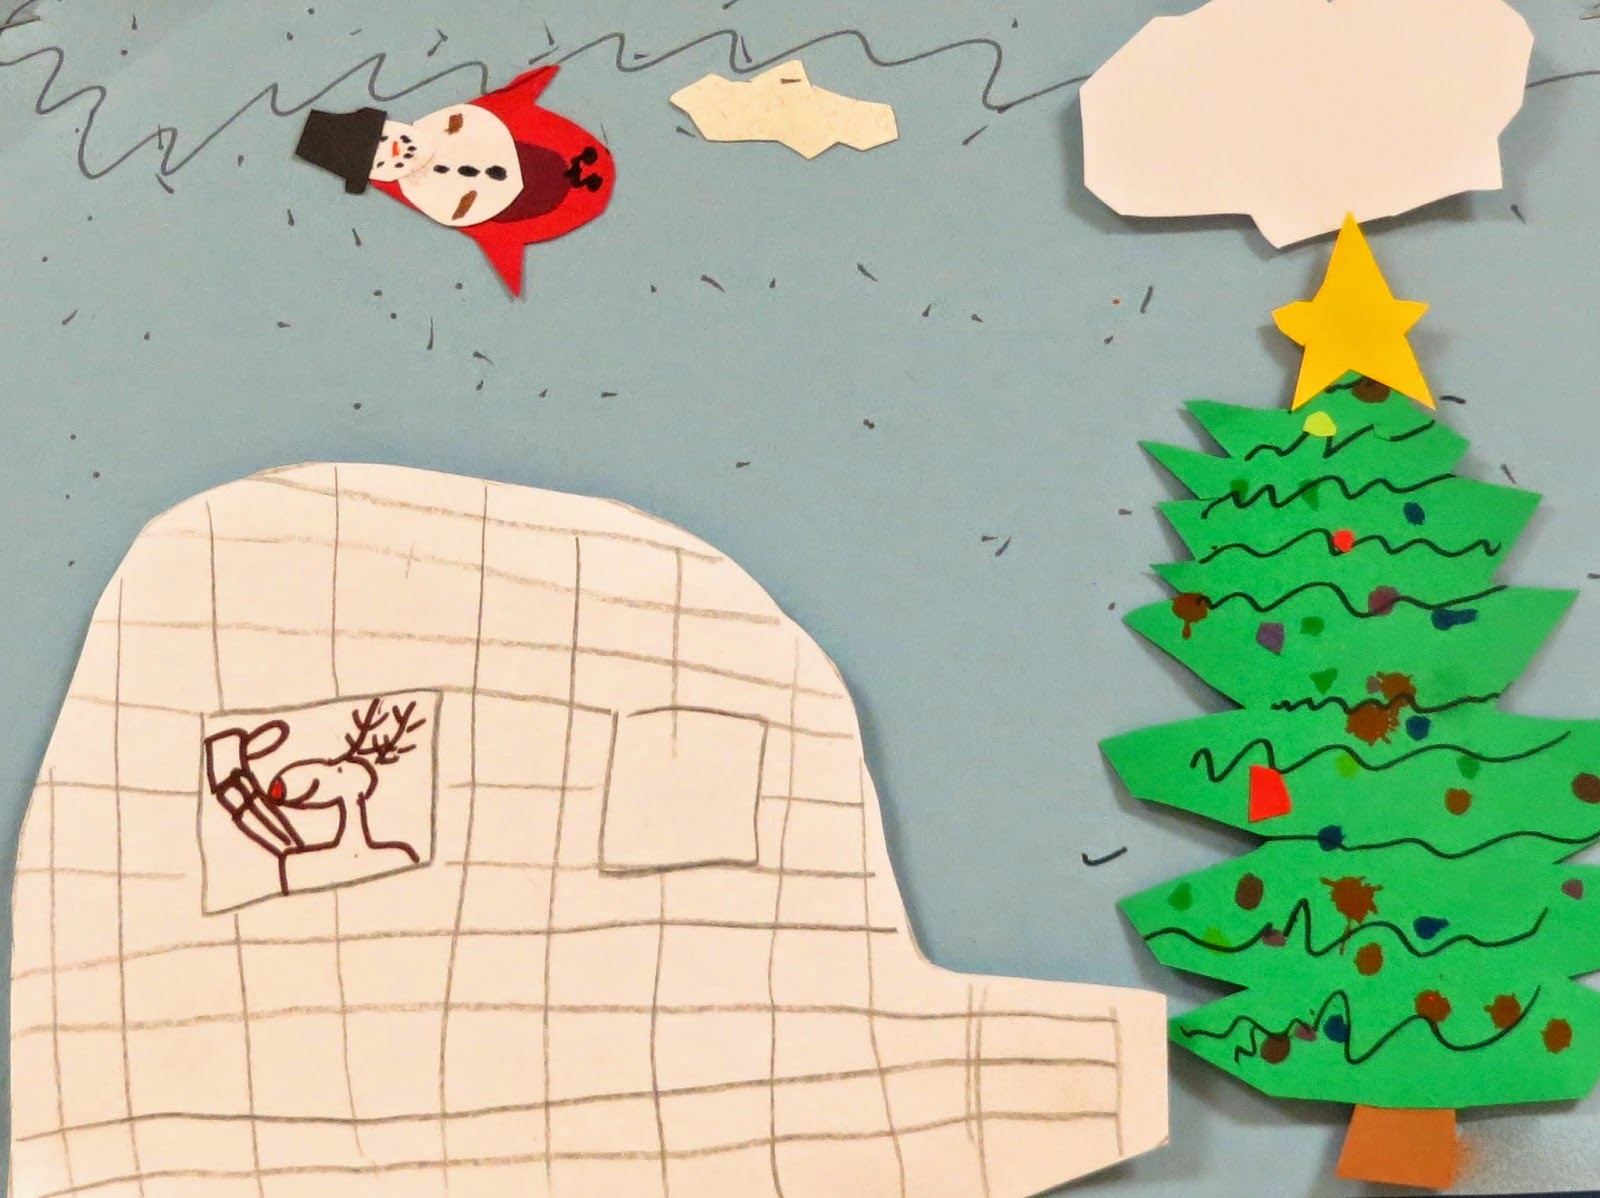
Holiday 3D Collages


I LOVE doing open ended projects with my elementary students.  They just flourish with the freedom these kinds of projects give them and it is so cool to see what they will come up with!

At this time of year, 
they have LOTS of energy and its time to harness that energy in a creative endeavor.  My fifth graders were given the opportunity to celebrate the holiday and winter season by creating a winter or holiday scene of their own design with cut pieces of construction paper.  I gave them each five
3D O’s to put behind various objects in their collage, making them pop out.

 They LOVED this!  The novelty of getting to have parts of their artwork instantly become a little more three dimensional was so fun for them and seemed to spark their creativity.  Isn’t it interesting how little unique things like this can open a door of wonder and self expression in elementary kids (and big kids, for that matter!)?  Who doesn’t love a fun process?  


HAPPY HOLIDAYS!!!


Friday, October 3, 2014

Self Portraits: What are you thinking?!


By the time students reach 6th grade they are more self-conscious about their drawing skills and do not always enjoy creating self portraits like they did when they were younger.

I tried this project this year after seeing an artwork of Nichol Brown’s  on Pinterest and I was thrilled that it worked out so well!  Students were less intimidated by drawing only half of their faces (and more of them actually look like themselves!) and they had fun figuring out what to draw in the designs above their heads.  

I asked them to choose 10 items to represent themselves and to find a fun way to have everything floating above their heads. They could also choose to color the items, or leave them just outlined in black.

When we began, we focused especially on drawing eyes and eyebrows.
  (Did you know that a study showed people recognize someone's eyebrows easier than their eyes, when shown only those body parts? Those little babies are important!)

It was great to see the variety of ways students expressed their interests and they were happy with the results (an awesome bonus at this self-critical age!) 


Happy Self-Portraiting! :-)

Wednesday, September 17, 2014

Homecoming Watercolor Paintings


As I wrote in last year’s Homecoming post,  I like to teach my elementary students how to draw our school Wildcat logo during Homecoming week.  We are a K-12 school all in one building and the younger students get very excited to participate in Homecoming in anyway they can, just like the “big kids.”  I’m still having fun coming up with ways to use this lovely little graphic. This new project was a quick and satisfying one and the students were very proud of their work! 

This year, after my 4th graders learned how to draw the Wildcat logo, we drew a larger one (on 12” x 18” heavy paper.)  They cut it out and using pieces of rolled masking tape, put it back together on top of a piece of watercolor paper 
(also 12” x 18”).

We then got out our watercolors and I demonstrated how to loosely brushstroke around the shapes in a rough crosshatch, blending colors as needed. This was a great way to practice control of our watercolor paint and handling the paintbrush.  Students were given the option of using our school colors or any other color combination that appealed to them. 

One thing I needed to remind students was that they should paint right up to and over the edge of the paper logo pieces that were taped down.  If they didn’t, the shape would not show up well.

When finished, students carefully removed the taped paper pieces and noticed how bright white their logo showed up against the paint.  We hung these in the hallway to show our school spirit. Very cool!  


Happy Homecoming!!


Friday, August 29, 2014

Guided Drawing: Minions!


Photo from www.despicableme.wikia.com

Don’t you love it when you get to teach your students something fun AND work on skill building at the same time?  Me too!!  All of my classes, from 4th grade to seniors, start their first class by making folders that contain their projects throughout the school year.  By the time they are seniors, those folders are more function than form.  BUT…its different for my elementary students.  Its all still fresh and new down in the Art room for them and they are excited to make folders and decorate them.  

This year, I am starting a new behavior program for my elementary students (more on that later…) and wanted to work on listening skills as an important part of being successful…in the classroom…in a job…in life!  One great way to do that is through a guided drawing project that we could add to our project folders.

Now let me say that I am not a fan of this type of art on a regular basis.  Students need open options and opportunities to create their own visions.  I am absolutely passionate about the importance of student self expression.  BUT an activity like this does have its place!


1)  Bringing something current and timely into the classroom gets kids excited - its very 
motivating.  I love the minions from Pixar’s “Despicable Me” and “Despicable Me 2” almost 
as much as my students.  They were so excited to learn how to draw these little guys!

(Sidenote:  We do talk a bit about copyright and not selling another person's ideas and art, etc…but at this age they are not trying to make a profit or steal someone’s ideas. They just want to draw. :-)  )


2)  It is, above all, a great listening exercise. Having to follow directions step by step is a great way to keep everyone tuned in.

3)  There is a high degree of success with an activity like this.  Students come in with such a wide range of skills.  Its great, every once in a while, for everyone to feel successful.  
That “I can do this!” attitude goes a long way toward feeling better about trying new things in Art class down the road.  We all need a little encouragement every now and then!


After we learned the basics, they were allowed to add any details, hairstyle changes, or other feature changes that they wanted to in order give their minion his/her own personality. The above photos were the practice drawings.  They did the final drawings right on their folders. 

It was a great way to start the year…and we’re ready for the next project! 

P.S.  I altered it some, but my initial drawing instructions came from this link.


Tuesday, May 13, 2014

Name Letter Art


Well here we are…wrapping up my first year of blogging.  
As always, the school year flew by!  It has been so gratifying to share ideas with other art education lovers and reflect on what works and doesn’t work with each of the projects I’ve posted. I truly feel it has made me a better educator. I find myself really thinking through each aspect of a project when writing about it and seeing if I can make it better for my students…and trying to create interesting and unique content in the process. 


This final post of the year is dear to my heart because it is only due to my variety of age groups that I can even write about it! 

As an experiment, 
I presented the same project
(with variations) to 4th graders and Art 2 students (sophomores).  It was really neat to see the growth (as there would obviously be in 6 years worth of development) in artistic sensibility that came through!!   

The project itself is simple.  I have a deep love for typography and a genuine respect for its place in our culture. Now more than ever, with our inundation from social media, websites, and computer culture…not to mention advertising, television, signage, etc. etc. etc...we are completely “fonted out!” 


So I ask students to create their name (or names) or a word (or short phrase) in an overlapped, interesting composition.  Older kids need to use lots of different letter styles, younger kids are shown how to draw a letter with a line and then draw around it to create the block letter style like their writing.  Both groups are asked to incorporate a crazy amount of pattern and color to give these letter designs a lot of pop and energy. They are challenged to FILL the page with letters and patterns.  We use 12x18 paper and layered colored pencils to complete the artwork.

 This project was a success with both age levels. Its a great way to help them notice the lettering world around them and improve their skills at the same time. Its also one of those "everyone is successful" projects which are nice to have now and then.

That's it for the year!

I look forward to recharging this summer and coming back excited for year 23!!  Woo-hoooo!

Happy Summer!!!

Wednesday, April 9, 2014

An Oldie but a Goodie... Crayon Batik!


Its SPRING!  And I think anyone who lived through this past nasty winter is VERY ready for it!!  We decided to celebrate it in the Art room with the 4th graders’ art project.  Its an oldie but a goodie…crayon batik!! 

We start with a little background info on fabric batik and look at some examples from different cultures. 

The process - although I’m sure you already know it - is to simply color heavily on printer paper (heavier paper does not seem to work as well) and outline each object in black crayon.  We chose to do a “Spring” theme because we were all very excited that its starting to warm up and we can be OUTSIDE! 


After coloring every single part of the paper with crayon (anything left white will turn black/gray)
students gently “crinkle” the paper by balling it up and flattening it out a couple of times.

Then we paint!  We cover the paper with watered down black tempera paint and then gently wipe the excess off with paper towels.  It settles beautifully in the creases and gives a lovely batik effect.  The “wow factor” of having the kids paint over their crayon art with black paint is pretty cool…they kind of freak out - until they see how neat these turn out. I love introducing them to new processes and ways of creating! 


Happy Spring!!

Friday, March 21, 2014

Textured Monsters and Aliens


Nothing is more fun than giving kids the opportunity to use their imagination!  This 4th grade project is a great way to do just that, while we study texture at the same time.  

We start out by talking about texture and then exploring the Art room and the hallway, gym and foyer area and searching for textures to do as crayon rubbings.  Students have a great time collecting rubbings and labeling their textures.

Then we come back to the room and talk about designing something that has never been seen before.  I invite them to turn on the pictures in their heads and design a (friendly) monster or alien!  

When designing, I ask them to think about how they will address:
* the facial features
* the limbs 
* the torso  
They are challenged to incorporate as many interesting shapes into their creatures as they can.

AND THEN…texture time!  We get our texture on by overlapping small pieces of masking tape on select areas of the monster or alien and using our trusty crayons to color. (We don’t use crayons much in my art classes…is that weird?)

We talk about the color rule we use in every grade and with every medium: coloring is ALWAYS more interesting when you mix colors…whether its paint, colored pencils, pastels or crayons.  The taped area takes this blending of colors especially well and their monster and alien creations have so much personality!  

Happy Creating!